
Tutorial 4: Making something Shiny
- Jul 4, 2018
- 3 min read
Power Up and Collectible: Lesson Four
With this tutorial we are going to make something Valuable and Shiny,
For your Character to Collect
Things you will learn this Lesson:
Drawing Tool
Adding New Nodes
Expanding Nodes Evenly
Step 1: For Step one we just need to make a Rectangle like the shape in the below picture. Remember this is made with the Square Tool as with previous lessons.


Step 2: So with step 2, We want to convert the Rectangle to a path (CTRL + SHIFT + C), Select the Top 2 Nodes (Hold down SHFT and Left Click on the Top 2 Nodes) Then hit the Add Node Button as Highlighted on the Picture Below. Then also do the same for the Bottom 2 Nodes, You should have 2 New Nodes in the Middle Top and Bottom.
Select both of the Middle nodes (SHFT Left Click) and Hit the > button to expand them equally,
Till they look like the below picture.

Step 3: We will Duplicate (CTRL + D) the Main Shape, And scale it down to the below shape. Do this by adjusting the arrows with the shape selected (The Black Arrow down the Tool Box on the Left Side)

Step 4: Here we are going to use the Drawing tool to make custom shapes, So select the Drawing tool as seen the picture below. Each corner of the shape is a Node, So just create straight lines in the shape of the Picture Below. To Close off the custom shape the last Stroke needs to be drawn to the first node that was drawn. This will make it a solid shape that can be filled etc.

Step 5: Now we will Duplicate that shape, Flip it with the H Key (Horizontal Flip) and place it next to the shape on the Right. Then Shift + Left Click the 2 Shapes, Duplicate them and Press V (Vertical Flip) And place them on the Bottom of the Original Shape. Note it does not matter if they Overhang as we will fix this in the next step.

Step 6: With Step Six, This is where we will clean up the Shapes. Start by Duplicating the Main Shape, Shift + Left Click one of the over hanging shapes, Then Choose Path, Intersection (As in the Picture). This will cut the shape down to be within the Original Main Shape. Do this step on each of the Overhanging Shapes (Remember to Duplicate the Main Shape for each one before you do the Intersection).

Step 7: Then Move those new Shapes to Behind the Middle “Rectangle” Shape, By Selecting one of the Four Custom Shapes and Hitting PAGE DOWN until it is behind the Middle Shape. Repeat this for the Other 3 Custom Shapes. Your Image should look like the Below Picture
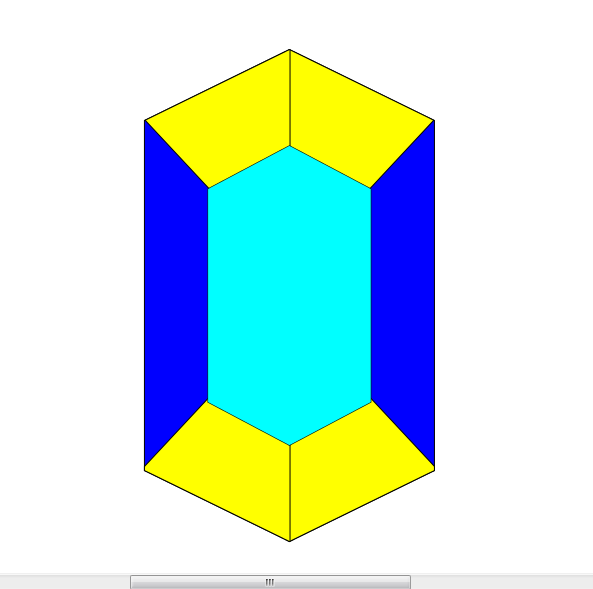
Step 8: In this Step we are going to choose Colours for our Jewel. Select each part of the Image and Colour it in the Shades like below (Can be any colour). Hit CTRL + SHIFT + F To bring up the Colour Wheel.

Step 9: In the Step Just make an oval shape, With the Circle tool, Make an Oval. Then Rotate it (By Clicking on the Shape twice till the Handles come up, Like previous Lessons). Place it like the below picture, Duplicate and Scale another one down, And place it again like the Below Picture.

Step 10: We will Duplicate the Original “Rectangle” And Scale it down just a bit. This will give a bit of a gap in colour on the Sides.
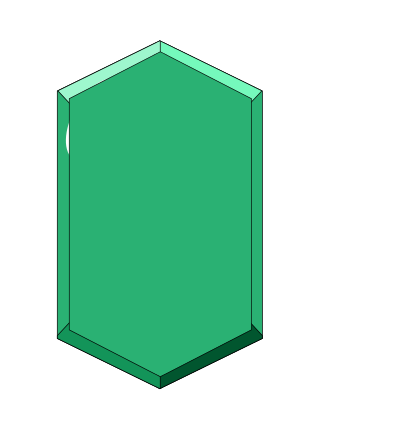
Step 11: Then Place this Shape Behind the other Shapes (Except the Original Shape) with Page Down.
Step 12: Then again we will create another Distorted Middle Shape, By Duplicating the Middle “Rectangle” And Scaling it in Horizontally like the Below Picture.

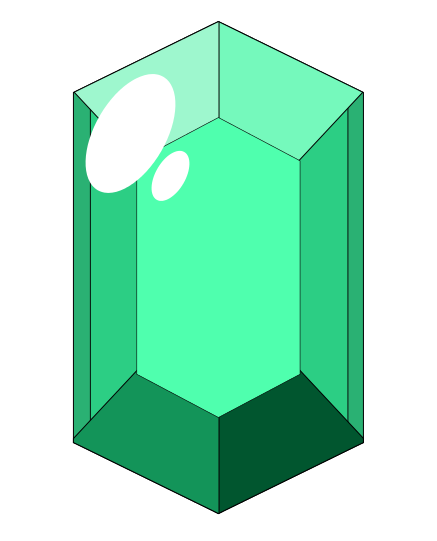
Step 13: On the Step I Select everything (By Dragging the Mouse over it holding Left Click, With the Select tool Selected) And Remove the Stroke Fill (In the Colour Wheel, There is a stroke tab, Just hit the X like Tutorials before).
Then Duplicate the Original Shape Remove the Fill and make the Stroke Wider (Last Tab of the Colour Wheel/Selecter Tab) to look like the Below Picture.
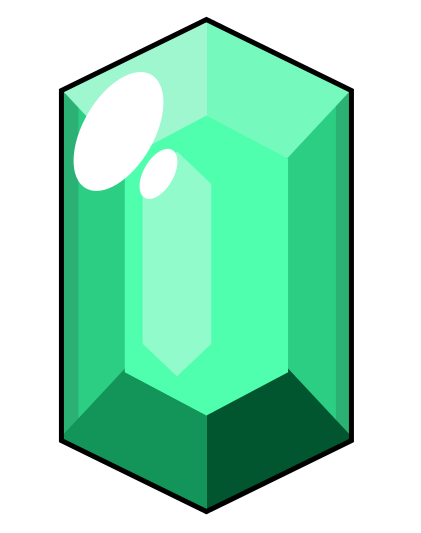
Step 14: Again we will use the Custom Shape Tool, To Create The Highlights on the Jewel Joins. You can also Duplicate and H and V Flip them as before to create the Below Picture.
And there you have it!
You have now created a Shiny Collectible or Power Up for your Game!
Great work and look at tackling some more of these!
You can Donate $0.99 to also get the SVG for this Lesson,
To study how I have done it.
Thanks for doing this Lesson
Daniel
WRGFX


Comments